
Koi fish are the bright assortments of the Amur carp. They are called Nishikigoi in Japan, which in a real sense means “brocade carp” in English. Their scales are likewise normally multi-hued, making them exceptionally appealing to check out. Because of the unmistakable dynamic examples on their scales, they are normally kept outside lakes or water gardens for enlivening purposes. Their magnificence has provoked a colossal interest in a free koi fish drawing instructional exercise. To meet our perusers’ desires, we have organized a bit-by-bit instructional exercise for drawing a koi fish, which is isolated into 9 edible moves to simplify it. If you are looking for drawing ideas, cool drawings, lion drawing for kids cute drawings, drawing for kids, cartoon drawings, girl drawing, 3d drawing and many more, then you are at the right place, here you will get all of these drawings.
Beginning in your paper, draw a bent bead shape to frame the state of the koi fish. To guarantee that the koi fish will be attracted to the actual focus of your paper, draw a crossing flat and vertical line. Your paper to make reference lines. Where the two lines meet is where you ought to draw the body of your koi fish.
On the sharp finish of the koi fish’s body, define a bent boundary upwards. Then, define a bent boundary, mostly down, beginning from the line’s end point we recently drew. This portrays one or a big part of the caudal balance or tail of the koi fish. When drawn accurately, its shape ought to look like 3/4 of the framework of a leaf.
Utilizing the layout of the half caudal balance we attracted in the past step, draw a comparable shape close to it to conclude the koi fish’s caudal blade. After finishing this step, your koi fish’s tail should now be full and complete.
In this step, we will currently structure the finish of the body side of the koi fish. Begin by defining an inclining boundary upwards. Then, define an upward boundary bending internally from the line’s endpoint downwards. At last, define one more slanting boundary to finish the state of the end. Remember that the two finishes of the layout ought not to be associated. Likewise, ensure that the edges of the end should be bent instead of sharp.
The gigantic balance at the highest point of a koi fish’s body is known as the dorsal blade, while the two little ones at the base are known as the ventral blade and butt-centric blade, individually. Begin by making the blade at the top by defining a wide, bent boundary with both. Its closures contact the outer layer of the koi fish’s body. Then, define two comparative boundaries at the lower part of the koi fish’s body. The finish of the right side ought to be somewhat bigger than that of the left.
After you have completed every one of the balances of the koi fish, the time has come to add examples and surfaces to it to make it more layered and practical. Define a few boundaries on the outer layer of the many balances to make its unmistakable example. Remember that the lines inside the balances ought not to be straight but instead lined up with the normal form of the blades.
Make your koi fish cheerful by defining a vertical bent boundary to make a tremendous grin. Then, define one more bent boundary toward the finish of the grin line to complete the look!
Since the koi fish looks sideways, a single eye is noticeable so we will draw one. Draw an ideal circle over the koi fish’s mouth to frame the eye. Then, attract a little circle of the eye to make the iris. Concealing the whole eye except the little circle inside to make a practical, gleaming eye impact. This stunt can make any person look more charming!
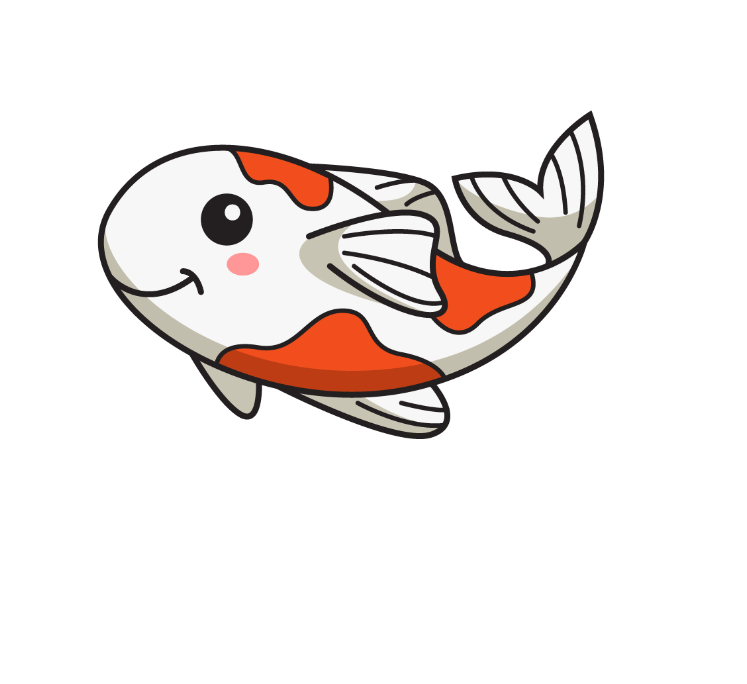
Koi fish are especially known for the novel examples imprinted on their scales. Making these templates is quite basic. Just draw a few lopsided shapes all around the body. Try not to accentuate the extent of these shapes. It doesn’t need to be awesome. The more lopsided these examples are, the more reasonable they will look! Since we have effectively drawn a koi fish, now is the right time to continue toward the tomfoolery part: picking tones and shading your koi fish drawing! Koi fish, for the most part, have different variety blends of dark, white, and orange. Nonetheless, some koi species are gold or platinum in variety.
also read: How to Draw a Koi Fish